A Home For Lace
Categories: Digressions
Back in the 1980s I took a class for bobbin lace because it was a dying art and I thought it should be preserved. Unfortunately there weren’t enough people to keep the Lacemaker shop open and it closed before I moved much beyond the raw beginner stage. And then between moves and life changes, the lace pillow was packed away. Now that I have a home again and more time in my life, I have unpacked.
Bobbin lace is how lace was made before machines. If you research the history of lace you will find that the task of making it was so exacting only royalty or extremely wealthy people wore it. When a girl was born, her family commissioned a lacemaker at the time of birth, so the lace would be finished in time for her wedding. Young girls around age four began training to make lace, beginning by learning how to make the pricking, or pattern. These children were tied to chairs to keep them still for hours, and they worked around a large table with a single candle in the center. Each child had a bowl of water in front of them to help refract the light. Most were blind by the time they were in their early teens. Such was the value of lace.
Now, however, it’s a handicraft you might see at county or state fairs alongside spinning wheels, crocheting, and knitting. In the 80s when I started, there were roughly 3,000 lacemakers in the States. Now I’m sure there are many more.
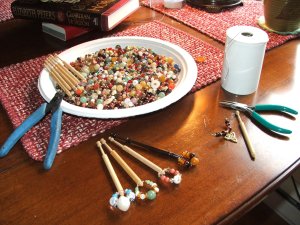
There are different styles of bobbins. I have both Belgium and English. Belgium are shaped like a pear and use the ‘bulb’ to weight the bobbin. I prefer English bobbins as they have interesting beaded spangles. In mediaeval times some beads warded off evil spirits; some brought luck. Then, as now, the beads work as weights to keep tension on the threads. Below, I am beading English bobbins. Rather than buying expensive beads at a craft store, I go to thrift stores and buy old necklaces and cut them up.
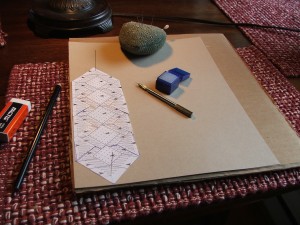
Next, a pricking is created. As I’m still a beginner, this is a Torchon lace pattern, meaning the lace is worked in straight lines. To make a pricking, a drawing on plain paper is attached to card stock. A tool called, originally enough, a pricker, is used to poke holes through the card stock. The card stock then becomes the pricking. Years ago I had a wonderful tiny wooden bowl filled with beeswax. All I could find now was a plastic box with candle wax. The pricker is stabbed into wax frequently to make the needle pass through the card stock easily. The lines on the paper version show which direction to work and will be drawn by pencil onto the pricked card stock.
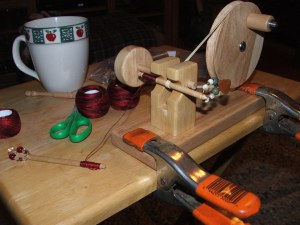
The bobbins are then wound with thread. Because lace is done by working with pairs of bobbins, two bobbins are wound from each end of a length of thread and then secured with a slip knot to keep the bobbins from unwinding while using. Below I am using a bobbin winder which saves wear and tear on your wrists.
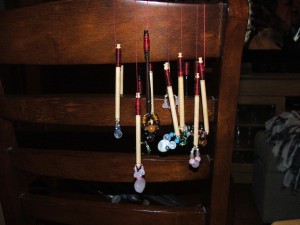
Another thing that helps is a place to hang the pairs as they are filled with thread. Years ago I had a handy wooden frame just for this. Now, a chair back works just fine to keep pairs from tangling.
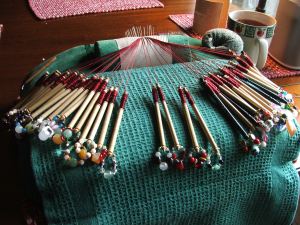
Once all is ready, the pricking is pinned to what is called a bolster, on a lace pillow. The bolster turns so as you work the completed lace feeds off the back. Holding pins are placed above the pricking to hold the bobbins ready to begin. You’ll see, next to the ever-present tea, another pricking. This one is a handkerchief edging I made in the 80s, curved from years pinned to the bolster. You’ll also notice four bobbins in the center, separated from the others. This is a worker pair and a weaver pair, ready for the first stitch. The stitches are done by weaving one pair through the other. After a pair is worked it is set aside and the weaver moves on to the next pair. To work the pricking, a stitch is done, a straight pin placed in the hole in the pricking, and then another stitch is worked to ‘close the pin’. The straight pins stay in place until at least an inch of lace is completed, then the pins from the back can be pulled and moved to new stitches in the front. This moving of pins allows the bolster to turn and the completed lace to feed off.
In spite of having the direction to work penciled on the pricking, I had to pull the stitches out three times because I went the wrong way. Remember, I never made it past the beginner stage, oh so many years ago. But below, finally, is the beginning of a bookmark.
